- Proper Ventilation Prevents Damage – Installing a bathroom exhaust fan during a remodel controls moisture, prevents mold growth, reduces odors, and protects walls, ceilings, and flooring.
- Choose the Right Fan for Your Space – Consider CFM rating, noise level (sones), fan type (standard or remote motor), and additional features like timers, heaters, or humidity sensors to match your bathroom size and needs.
- Plan and Install Ducting Carefully – Use insulated flexible ducting, vent directly outside (never into attics or soffits), seal connections properly, and install a backdraft damper to maintain airflow efficiency and prevent condensation.
- Follow Safety and Code Requirements – Turn off power before installation, follow electrical safety protocols, and comply with local building codes regarding fan placement, airflow, and venting.
- Upgrading During a Remodel Is Easier – Replacing an old fan during a remodel allows for quieter operation, improved energy efficiency, better airflow, and the option to install modern features or remote motor systems.
- Maintenance Extends Fan Life – Regular cleaning of the grille, inspecting ductwork for blockages or leaks, and monitoring motor performance ensures the fan continues operating efficiently and can last 10–15 years.
A bathroom remodel is one of the most exciting home improvement projects you can take on. From updating tiles and fixtures to adding modern lighting, a remodel can completely transform the space. But one critical element that’s often overlooked is ventilation. Installing a bathroom exhaust fan during your remodel is essential to prevent moisture buildup, mold growth, lingering odors, and even structural damage over time.
If you’ve ever wondered how to install a bathroom exhaust fan during your bathroom remodel, this guide provides a comprehensive, step-by-step overview. Whether you’re a DIY enthusiast or just starting with home improvement projects, these tips and detailed instructions will help you install an effective and safe bathroom fan.
Why a Bathroom Exhaust Fan Is Essential During a Remodel
It’s easy to assume that a window alone can ventilate a bathroom, but in reality, windows often provide insufficient airflow, especially in bathrooms with showers or bathtubs. Here’s why installing a fan is crucial:
- Moisture Control: Bathrooms generate a lot of moisture, particularly when multiple showers are taken daily. Excess moisture can damage paint, warp wood, loosen tiles, and even affect cabinets and flooring. A properly installed fan helps remove this moisture before it causes problems.
- Mold and Mildew Prevention: Mold can begin growing within 24–48 hours in damp environments. A fan removes humidity quickly, drastically reducing the likelihood of mold and mildew forming in walls, ceilings, or hidden attic spaces.
- Odor Removal: Bathroom fans quickly remove odors, keeping your space fresh and comfortable for family members and guests.
- Energy Efficiency: Modern exhaust fans are designed to use minimal electricity while improving indoor air quality. By keeping humidity under control, fans can also help reduce heating and cooling costs.
Installing a fan during a remodel is much easier than retrofitting one after your ceiling is finished, as you have access to the ceiling cavity, joists, and attic space, which allows for optimal ductwork planning.
How to Choose the Right Bathroom Exhaust Fan
Choosing the right fan for your bathroom is critical. There are several factors to consider:
- CFM Rating (Cubic Feet per Minute): This measures the amount of air the fan can move. Proper airflow ensures the bathroom clears moisture quickly. As a rule of thumb:
- Bathrooms up to 50 sq. ft.: 50–80 CFM
- Bathrooms 50–100 sq. ft.: 80–110 CFM
- Bathrooms larger than 100 sq. ft.: 110–150+ CFM
- Noise Level (Sones): Fan noise is often overlooked but can be an annoyance. Lower sone ratings are quieter:
- 1–2 sones: very quiet, barely noticeable
- 3–4 sones: average noise
- 5+ sones: quite loud, may be distracting
- Fan Type:
- Standard Fans: These all-in-one units have the motor housed directly in the fan unit installed in the bathroom ceiling. They are easy to install in smaller bathrooms or with short duct runs.
- Remote Motor Fans: For bathrooms where the fan will need long duct runs or will be exposed to moisture (e.g., above a shower), a remote motor system is ideal. The motor is placed in an accessible location like the attic, and only the fan grille sits in the bathroom. This reduces noise in the bathroom and allows for safer installation in wet zones.
- Additional Features: Modern fans often come with optional features like integrated lighting, heaters, motion sensors, or humidity sensors. Some advanced models allow you to add a plug-and-play module to the fan housing, so you can switch between a timer, humidity sensor, or motion activation without replacing the entire fan.
- Style and Size: Ensure the fan matches your bathroom aesthetic and fits your ceiling space. Consider grille design, color, and height clearance.
Tools and Materials You’ll Need
Having all the right tools and materials ready before beginning makes installation smoother and prevents interruptions:
- Screwdrivers (flathead and Phillips)
- Power drill with bits
- Stud finder
- Measuring tape
- Drywall saw or keyhole saw
- Utility knife
- Ladder or step stool
- Insulated flexible ducting (reduces noise and prevents condensation)
- Duct tape or foil tape
- Electrical wiring and connectors
- Exhaust fan unit with mounting hardware
- Safety gear (gloves, goggles, dust mask)
Step-by-Step Guide to Installing a Bathroom Exhaust Fan
Step 1: Turn Off the Power
Safety first. Switch off the bathroom circuit at the breaker box and confirm with a voltage tester that the wires are not live. This is especially important if your fan includes a light or heater.
Step 2: Plan the Fan Location
Choosing the right location is key for effective ventilation:
- Position the fan near the shower or bathtub where moisture accumulates most.
- Avoid ceiling corners or areas obstructed by joists.
- Ensure ductwork can reach the exterior vent with minimal bends.
- Allow space in the attic or ceiling cavity for maintenance and future upgrades.
Step 3: Cut the Ceiling
Use the fan’s template to mark the cutout. Key tips for cutting:
- Double-check measurements to avoid a hole that’s too large.
- Clear debris to prevent interference with the fan housing.
- Adjust insulation carefully to maintain energy efficiency.
Step 4: Install Ductwork
Proper duct installation is crucial for fan performance:
- Use insulated flexible ducting to reduce noise and prevent condensation. Moisture from warm, humid air can condense in cold attic spaces, causing water problems.
- Venting should always go outside. Avoid venting into attics or soffits, as this can lead to mold and moisture issues.
- Seal all duct connections with foil or duct tape to prevent air leaks.
- Install a backdraft damper at the exterior vent to prevent cold air or pests from entering.
- Keep duct runs short and straight for optimal airflow.
Step 5: Wire the Fan
- Identify house wires (black = hot, white = neutral, green/bare = ground).
- Connect corresponding fan wires using wire nuts.
- If your fan has lights, heaters, or sensors, follow the manufacturer’s instructions for wiring.
- Tuck all wires neatly into the junction box.
Step 6: Mount the Fan
- Lift the fan housing into the ceiling cutout and secure it to the joists with screws.
- Ensure the fan is level and tighten screws evenly.
- Add mounting brackets or shims if needed for a snug fit.
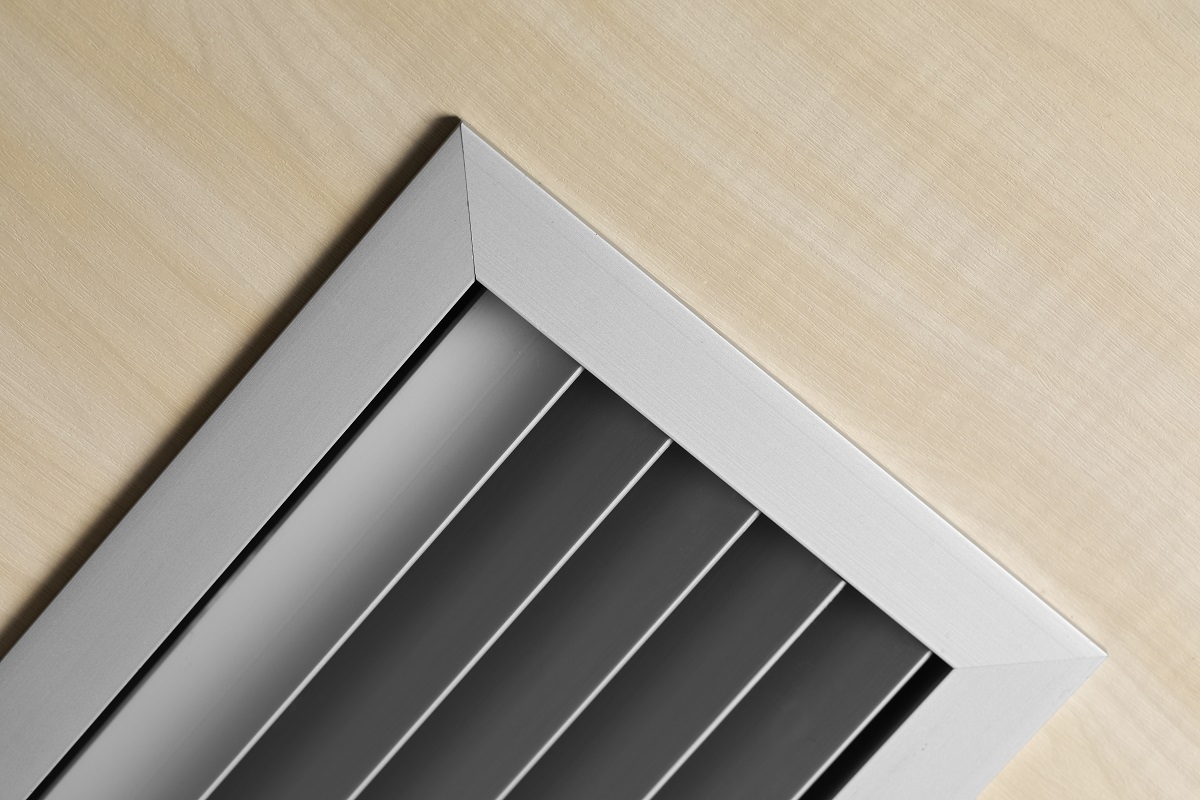
Step 7: Attach the Vent Cover
- Snap or screw the grille into place.
- The cover directs airflow efficiently and prevents debris from entering.
- Provides a clean, finished look for your bathroom ceiling.
Step 8: Test the Fan
- Turn power back on.
- Check for smooth, quiet operation.
- Ensure the fan clears steam and odors effectively.
- Inspect duct connections for leaks.
Fan Controls and Smart Features
Fans only work well if they run long enough to clear moisture. Simple on/off switches may not be sufficient. Consider:
- Mechanical Timers: Allow users to run the fan for a set time (e.g., 30–40 minutes).
- Digital Timers: Preset electronic options (e.g., 10, 20, 60 minutes).
- Humidity Sensors: Automatically detect high moisture and run the fan until the air is dry.
- Modular Fans: Plug-and-play modules allow easy upgrades with timers, humidity sensors, or motion activation without replacing the fan.
Smart controls improve efficiency and convenience while ensuring the bathroom stays dry.
Tips for a Smooth Installation

Plan Your Ducting in Advance
Proper duct planning is one of the most important steps when installing a bathroom exhaust fan. Mapping out the duct route before cutting into the ceiling or starting any wiring work prevents the need for complicated retrofitting later. Consider the shortest and straightest path from the fan to the exterior vent, avoiding obstacles like joists and plumbing. This planning ensures optimal airflow and reduces the risk of future maintenance problems.
Seal Ductwork Properly
Sealing the ductwork correctly is essential for both efficiency and safety. Even small leaks can reduce airflow, making the fan less effective at removing moisture and odors. Additionally, unsealed ducts can cause condensation to form, which may damage ceiling insulation or lead to mold growth. Using foil or specialized duct tape for all connections creates a tight, airtight seal, keeping the system operating efficiently for years.
Install a Backdraft Damper
A backdraft damper is a small but crucial component of any bathroom exhaust system. This device prevents outside air, pests, and debris from entering your ductwork when the fan is not running. By installing a backdraft damper near the exterior vent, you maintain energy efficiency and protect your bathroom from drafts that could affect heating or cooling.
Allow Space for Maintenance Access
When mounting the fan and ductwork, leave adequate clearance around the housing. This extra space allows for easy maintenance, such as cleaning the fan, inspecting the motor, or replacing worn parts in the future. Fans installed too tightly can be difficult to service, often requiring removal of drywall or ducting to access essential components.
Follow Local Codes
Always check local building codes before installation. Regulations may specify minimum airflow rates, fan placement, or acceptable venting locations. Following these codes ensures your installation is safe, efficient, and compliant with local regulations. Noncompliance could lead to inspection issues or require costly modifications later.
Common Mistakes to Avoid
Placing the Fan Too Far from Moisture Sources
The effectiveness of a bathroom exhaust fan depends heavily on its placement. Installing the fan far from the shower or bathtub means it will struggle to remove steam before it spreads across walls and ceilings. Positioning the fan near moisture sources ensures faster removal of humidity and reduces the risk of mold growth.
Using Flexible Ducting with Sharp Bends
Flexible ducts are convenient but can restrict airflow if bent excessively. Sharp bends or twists can trap moisture inside the duct and lower fan efficiency. If flexible ducting is necessary, keep the run as straight as possible and minimize bends to maintain strong airflow.
Failing to Seal Duct Connections
Air leaks in the duct system can significantly reduce performance and lead to condensation problems. All duct joints should be sealed with foil tape or appropriate connectors to prevent air from escaping and moisture from collecting inside the duct.
Neglecting Electrical Safety Precautions
Working with electricity always carries risks. Failing to switch off the circuit at the breaker box or not verifying that wires are dead can result in serious injury. Follow safety protocols, use insulated tools, and ensure all wiring is secured and compliant with electrical codes.
Choosing a Fan That’s Too Small
A fan that is undersized for the bathroom will not remove humidity efficiently. Always match the fan’s CFM rating to the square footage of your bathroom to maintain proper ventilation. Oversized fans may waste energy, while undersized units can leave moisture lingering, causing damage over time.
Venting Into Attics or Soffits
Never vent a bathroom fan into an attic or soffit. Moist air expelled into these areas can lead to mold, rot, and structural damage. Always vent directly outside through a roof or gable end vent for safe and effective moisture control.
Costs of Installing a Bathroom Exhaust Fan
DIY installation can save money but requires careful planning and safety adherence.
- Fan unit: $50–$250 depending on features.
- Ducting and supplies: $20–$50.
- Tools (if not owned): $50–$100.
- Professional installation: $150–$500.
Installation Timeline
- DIY: 2–4 hours
- Professional: 1–2 hours
- Influenced by ceiling access, ductwork, and wiring complexity.
Maintenance Tips
- Clean grille every 3–6 months.
- Inspect ducting annually for blockages or leaks.
- Listen for motor noises or vibration.
- Replace fans every 10–15 years or when efficiency drops.
Final Thoughts
Installing a bathroom exhaust fan during your remodel may seem daunting, but with careful planning, the right tools, and proper installation, it is achievable. Proper ventilation protects your bathroom from moisture damage, mold, and odors while improving energy efficiency. By choosing the right fan, ducting, and controls—and maintaining it regularly—you can enjoy a fresh, well-ventilated, and comfortable bathroom for years to come.