When starting an interior painting project, one question comes up almost every time: Should you paint the ceiling or walls first? While it may seem like a small detail, the order you paint in can make a big difference in how clean, smooth, and professional your results look.
Painting in the wrong order can lead to extra work, messy edges, and frustration. Painting in the right order saves time, reduces touch-ups, and helps you achieve a polished finish—even if you’re a beginner. This guide explains exactly which surface to paint first, why it matters, and how to approach the job step by step for the best outcome.
The Short Answer: Ceiling or Walls First?
The simple and widely recommended answer is: paint the ceiling first, then the walls.
Professional painters almost always start with the ceiling, and there are good reasons for this approach. Painting the ceiling first allows you to work more freely without worrying about splattering paint onto freshly painted walls. It also makes cutting in cleaner and easier when you move on to the walls.
While there are rare exceptions, painting the ceiling first is the safest and most efficient method for most home improvement projects.
Why Painting Order Matters
The order you paint surfaces affects more than just appearance. It impacts efficiency, cleanliness, and the quality of the final result.
Key Reasons Painting Order Is Important
- Prevents paint splatter issues: Ceiling paint can drip or splatter, even with careful technique. Painting the ceiling first prevents damage to finished walls.
- Creates cleaner edges: When walls are painted after the ceiling, it’s easier to cut in neatly along the ceiling line.
- Saves time: Fixing splatters or repainting damaged walls adds unnecessary work.
- Reduces frustration: Following the correct order minimizes mistakes and stress.
Starting with the ceiling sets the foundation for a smoother and more professional-looking paint job.
Why You Should Paint the Ceiling First

Painting the ceiling first gives you more flexibility and control throughout the project.
Ceiling Paint Is Messier Than Wall Paint
Ceiling paint is thicker and applied overhead, which increases the chance of drips and splatter. Even experienced painters occasionally get paint on the walls. When the walls are unpainted, this isn’t a problem—you’ll cover it later.
Easier Wall Cut-In Work
When the ceiling is already painted, you can cut in the wall paint slightly over the ceiling line. This creates a sharp, clean edge without worrying about ceiling paint overlapping wall color.
Better Visual Progress
Painting the ceiling first instantly brightens the room and makes it easier to see how the wall color will look once applied. It also helps you spot imperfections before moving on.
When Painting the Walls First Might Make Sense
Although painting the ceiling first is best in most cases, there are a few situations where painting the walls first may be acceptable.
Rare Exceptions Include:
- Minor wall touch-ups only: If the ceiling is already finished and you’re only repainting walls lightly.
- Ceiling panels or tiles: Some drop ceilings are installed after wall painting.
- Accent ceilings added later: In rare cases, a ceiling color is added after walls for design reasons.
Even in these situations, careful masking and protection are required to avoid damage.
Preparing the Room Before Painting
Regardless of the order, preparation is the key to success.
Room Preparation Steps
- Move furniture out or to the center of the room
- Cover floors and furniture with drop cloths
- Remove or cover light fixtures and ceiling fans
- Tape off trim, windows, and door frames
- Clean walls and ceilings to remove dust and grease
Skipping preparation often leads to peeling paint, uneven coverage, and messy results.
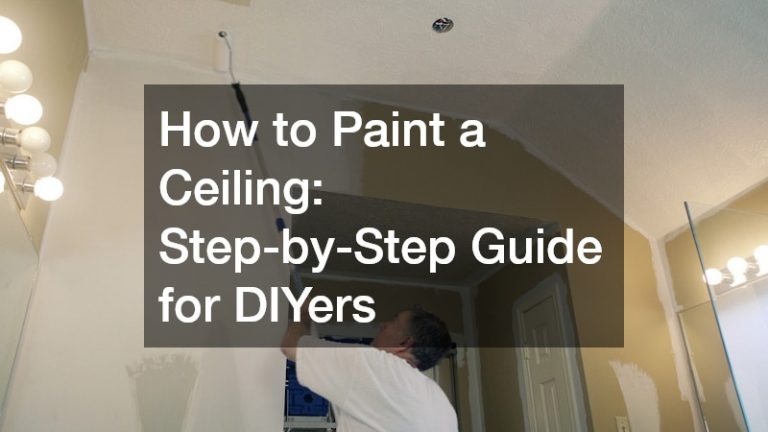
How to Paint a Ceiling the Right Way
Understanding how to paint a ceiling properly makes the entire project easier and improves the final look.
Ceiling Painting Basics
- Use flat or matte ceiling paint to hide imperfections
- Use a roller with an extension pole to reduce strain
- Work in small sections to maintain even coverage
- Roll slowly to reduce splatter
- Apply two coats if needed for full coverage
Painting the ceiling first allows you to focus on technique without worrying about ruining finished walls.
Step-by-Step Painting Order for Best Results
Following a clear sequence keeps your project organized and efficient.
Step 1: Paint the Ceiling
- Cut in along the ceiling edges with a brush
- Roll paint in straight lines across small sections
- Maintain a wet edge to avoid lap marks
- Allow proper drying time between coats
Step 2: Let the Ceiling Fully Dry
Drying time is critical. Rushing this step can cause peeling or streaking.
- Most ceiling paint dries to the touch in 1–2 hours
- Wait 4–6 hours before applying a second coat
- Allow at least 24 hours before painting walls
Step 3: Paint the Walls
- Cut in along the ceiling line and corners
- Roll paint from top to bottom
- Use even pressure and consistent strokes
- Apply a second coat if needed
This order ensures clean lines and fewer touch-ups.
Common Mistakes to Avoid
Painting mistakes are often caused by rushing or poor planning.
Mistakes That Lead to Extra Work
- Painting walls before the ceiling
- Skipping prep and cleaning
- Using the wrong paint finish
- Not allowing enough drying time
- Applying uneven pressure while rolling
Avoiding these mistakes helps you achieve professional-looking results without frustration.
Tips for Clean Lines Between Ceiling and Walls
Clean lines make a big difference in how polished a room looks.
How to Get Sharp Edges
- Use an angled brush for cutting in
- Paint walls slightly over the ceiling line if needed
- Use painter’s tape carefully, removing it before paint fully dries
- Work slowly and steadily
Painting walls after the ceiling makes this step much easier.
What About Trim, Doors, and Windows?
Painting order doesn’t stop at ceilings and walls.
Recommended Painting Order
- Ceiling
- Walls
- Trim (baseboards, door frames, window frames)
- Doors
Painting trim last prevents splatter from ruining finished surfaces and ensures crisp edges.
How Long the Entire Process Takes
Time varies depending on room size and drying conditions.
Average Timeline
- Prep work: 1–2 hours
- Ceiling painting: 1–2 hours per coat
- Drying time: 4–24 hours
- Wall painting: 2–4 hours per coat
Proper planning helps you avoid rushing and mistakes.
DIY vs. Hiring a Professional Painter

Painting order matters whether you DIY or hire help.
DIY Painting Pros and Cons
Pros:
- Lower cost
- Flexible schedule
- Sense of accomplishment
Cons:
- More time-consuming
- Requires physical effort
- Learning curve for beginners
Hiring a Professional
Professionals already follow the correct order and use advanced tools. This can be worth it for large rooms, high ceilings, or time-sensitive projects.
Cost Considerations
Painting order doesn’t affect paint cost directly, but mistakes can increase expenses.
Typical DIY Costs
- Paint: $30–$60 per gallon
- Supplies: $20–$50
- Total per room: $50–$150
Redoing mistakes can double costs, which is why following the correct order matters.
Conclusion
When deciding whether to paint the ceiling or walls first, the answer is clear for most projects: always start with the ceiling. Painting the ceiling first protects your walls from splatter, makes cutting in easier, and helps create clean, professional-looking lines. While there are rare exceptions, following the proper order saves time, reduces frustration, and leads to better results overall. Combined with proper preparation, quality materials, and patience, the right painting sequence can transform your space without unnecessary touch-ups. Whether you’re refreshing one room or tackling an entire home, understanding the correct order ensures a smoother process and a finish you can be proud of.