
Painting a ceiling can feel intimidating, especially if you’ve never done it before. Drips, uneven coverage, and sore arms are common worries for many homeowners. The good news is that painting a ceiling doesn’t have to be stressful or messy. With the right preparation, tools, and technique, you can achieve clean, professional-looking results on your own.
This guide walks you through everything you need to know about how to paint a ceiling—from choosing the right paint to avoiding streaks and drips. Whether you’re refreshing one room or tackling your entire home, these steps will help you work confidently and efficiently.
Why Painting a Ceiling Matters
Many homeowners focus on walls and forget about the ceiling. However, ceilings play a major role in how a room looks and feels.
A freshly painted ceiling can:
- Brighten a dark or outdated room
- Make ceilings appear higher and more open
- Cover stains, discoloration, and age marks
- Create a clean backdrop for walls and lighting
Old ceilings often develop yellowing, water stains, or uneven patches over time. Painting restores a clean, uniform look that instantly improves the space.
Choosing the Right Paint for a Ceiling

Not all paints are created equal, and ceilings require a specific type of paint for best results.
Best Paint Finish for Ceilings
Flat or matte finishes are the most popular choices for ceilings because:
- They hide imperfections better than glossy finishes
- They reduce glare from lighting
- They provide a smooth, even appearance
Avoid satin or semi-gloss paint on ceilings unless the area requires moisture resistance, such as in bathrooms or kitchens.
Ceiling Paint vs. Wall Paint
Ceiling paint is thicker than standard wall paint, which helps reduce dripping. Many ceiling paints are also tinted slightly to help you see where you’ve painted, then dry to a bright white.
Choosing the Right Color
- White is the most common choice because it reflects light and opens up a room
- Light gray or cream can soften a space without darkening it
- Matching the wall color can create a modern, seamless look
For most rooms, a bright white or off-white ceiling works best.
Tools and Supplies You’ll Need
Using the right tools makes painting easier and helps you avoid common mistakes.
Essential Painting Tools
- Paint roller with an extension pole
- Roller covers (⅜-inch or ½-inch nap)
- Angled paintbrush for edges
- Paint tray or bucket with roller grid
- Drop cloths or plastic sheeting
- Painter’s tape
- Ladder or step stool
- Safety glasses and a hat
Optional but Helpful Items
- Ceiling paint with anti-drip formula
- Paint shield for clean edges
- Work light to spot missed areas
Having everything ready before you start saves time and prevents interruptions.
Preparing the Room Before Painting
Preparation is one of the most important steps when painting a ceiling. Skipping it often leads to messes and poor results.
Clear and Protect the Room
- Move furniture out or to the center of the room
- Cover floors and furniture with drop cloths
- Remove ceiling fixtures if possible
- Tape off walls, trim, and vents
Taking time to protect surfaces prevents paint splatter and makes cleanup easier.
Clean the Ceiling
Dust, grease, and cobwebs can prevent paint from sticking properly.
- Use a broom or vacuum to remove dust
- Clean greasy areas with mild soap and water
- Allow the ceiling to dry completely
Repair Cracks and Imperfections
Inspect the ceiling for cracks, nail holes, or peeling paint.
- Fill cracks with spackling compound
- Sand smooth once dry
- Remove loose or peeling paint
A smooth surface ensures even paint coverage.
Should You Prime the Ceiling?
Priming isn’t always required, but it can make a big difference in certain situations.
When to Use Primer
You should prime the ceiling if:
- There are water stains or smoke damage
- You’re painting over dark colors
- The ceiling has been patched or repaired
- You’re painting bare drywall
Primer seals stains and helps the paint adhere evenly.
When You Can Skip Primer
If the ceiling is clean, light-colored, and previously painted, you may be able to paint directly over it using high-quality ceiling paint.
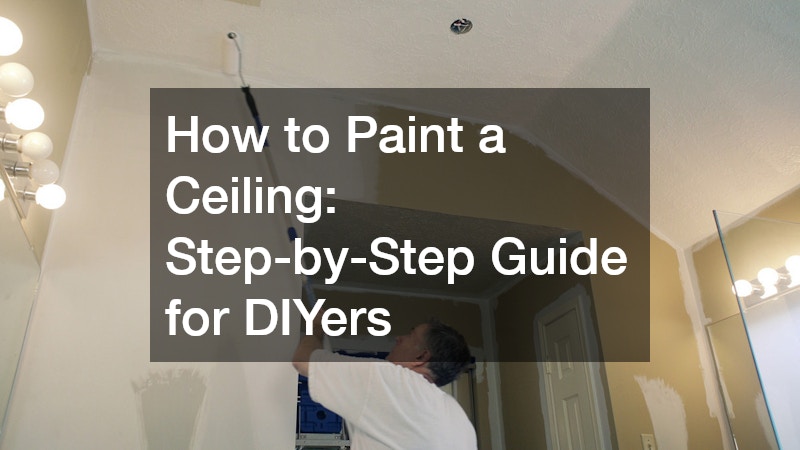
How to Paint a Ceiling Step by Step
Now that your room is ready, it’s time to start painting.
Step 1: Cut In the Edges
Use an angled brush to paint a border around the edges of the ceiling.
- Paint a 2- to 3-inch strip where the ceiling meets the walls
- Work in small sections to keep edges wet
- Use steady strokes for clean lines
Cutting in first helps create a smooth transition between the roller and brush areas.
Step 2: Load the Roller Correctly
Proper roller loading reduces drips and splatter.
- Dip the roller into the paint
- Roll it along the tray or grid to distribute paint evenly
- Avoid overloading the roller
A well-loaded roller applies paint smoothly without dripping.
Step 3: Paint in Small Sections
Work in manageable sections, usually about 4 by 4 feet.
- Roll paint in one direction first
- Then roll across it to spread evenly
- Keep a wet edge to avoid lap marks
Painting in sections helps maintain consistency and prevents streaks.
Step 4: Use the Right Rolling Pattern
Use a slow, controlled motion to reduce splatter.
- Roll in straight lines, not random strokes
- Apply even pressure
- Avoid pressing too hard on the roller
Smooth, steady movements create an even finish.
Step 5: Apply a Second Coat if Needed
Most ceilings require two coats for full coverage.
- Allow the first coat to dry fully
- Apply the second coat perpendicular to the first
- Inspect for thin spots or missed areas
The second coat improves durability and color consistency.
Tips to Avoid Drips, Streaks, and Mess
Ceiling painting comes with unique challenges, but these tips help prevent common problems.
Drip Prevention Tips
- Use ceiling-specific paint
- Avoid overloading the roller
- Roll slowly and evenly
- Wear protective gear
Avoiding Streaks and Roller Marks
- Keep a wet edge while painting
- Use consistent pressure
- Don’t go over drying paint
Reducing Arm and Neck Strain
- Use an extension pole
- Take breaks often
- Stretch your arms and neck
Comfort matters, especially for larger rooms.
Painting Different Types of Ceilings
Not all ceilings are the same. Some require extra care.
Textured or Popcorn Ceilings
- Use a thicker roller nap
- Apply gentle pressure
- Avoid excessive rolling
Textured ceilings can absorb more paint, so plan accordingly.
Vaulted or High Ceilings
- Use a sturdy extension pole
- Work from a safe ladder
- Consider professional help for extreme heights
Safety should always come first.
How Long Does Ceiling Paint Take to Dry?
Drying times vary depending on paint type and room conditions.
- Most ceiling paint dries to the touch in 1–2 hours
- Wait 4–6 hours before applying a second coat
- Allow 24 hours before heavy room use
Good ventilation speeds up drying and improves results.
Common Mistakes to Avoid

Avoiding common mistakes when painting a ceiling can save you time, money, and frustration. Many problems—such as streaks, peeling paint, or uneven coverage—are usually caused by rushing or skipping important steps. Understanding what not to do helps you achieve cleaner, longer-lasting results and reduces the need for touch-ups later.
- Skipping prep work: Preparation is one of the most important parts of painting a ceiling. Skipping steps like cleaning dust, repairing cracks, or covering furniture can lead to poor paint adhesion and messy results. Dust, grease, and loose paint prevent the new paint from sticking properly, causing peeling or patchy areas. Taking time to prep ensures a smooth and durable finish.
- Using the wrong paint finish: Choosing the wrong paint finish can make ceiling imperfections more noticeable. Glossy or satin finishes reflect light, highlighting cracks, seams, and uneven textures. Flat or matte ceiling paint is designed to hide flaws and create a smooth, uniform look, making it the best choice for most rooms.
- Painting too fast: Rushing through the job often leads to drips, splatters, and uneven coverage. Painting too quickly can also cause roller marks and missed spots. Working slowly and methodically allows you to maintain even pressure, control drips, and keep a wet edge for a cleaner finish.
- Ignoring stains without primer: Water stains, smoke damage, or discoloration will often bleed through regular paint if they are not sealed first. Skipping primer can result in stains reappearing, even after multiple coats. Using a stain-blocking primer ensures full coverage and prevents future discoloration.
- Not allowing enough drying time: Applying a second coat too soon can cause peeling, streaks, or an uneven texture. Paint needs time to cure properly between coats. Following the recommended drying times helps the paint set correctly and improves durability.
Taking a careful, patient approach throughout the process leads to better results, fewer touch-ups, and a ceiling that looks clean and professionally painted.
When to Hire a Professional
While painting a ceiling is a DIY-friendly project, there are times when hiring a professional makes sense.
Consider professional help if:
- The ceiling is very high or hard to reach
- There is extensive water damage
- You have limited time or mobility
Professionals have specialized tools and experience for challenging jobs.
How Much Does It Cost to Paint a Ceiling?
DIY ceiling painting is budget-friendly.
Typical costs include:
- Paint: $30–$60 per gallon
- Supplies: $20–$50
- Total DIY cost: $50–$150 per room
Hiring a professional can cost several hundred dollars per room, depending on size and complexity.
Conclusion
Painting a ceiling may seem challenging, but with the right preparation and technique, it is a manageable and rewarding DIY project. Choosing the proper paint, gathering the right tools, and preparing the room thoroughly set the foundation for success. By working in small sections, using controlled roller movements, and applying even coats, you can achieve a smooth, professional-looking finish. Taking your time and avoiding common mistakes helps prevent drips, streaks, and uneven coverage. Whether you’re refreshing a single room or updating your entire home, painting the ceiling can dramatically improve the look and brightness of your space. With patience, attention to detail, and the steps outlined in this guide, you can confidently paint your ceiling and enjoy cleaner, brighter rooms for years to come.